PrintStackTrace

Friday, March 10, 2023

Golang setup PATH

Quite recently we startet in the company to use and write some Go programs. I love Go. It's easy to learn, read and modify.

One of the most interesting programs, that (I did not start, but) I'm developing on is an HTTP-Tunnel, that I modified for our needs. Initially it was just because the original author did not work on it anymore, and did not accept any of my pull requests, but meanwhile I really like it.

However, the main reason for this blog post is to show my path configuration for go on mac

export GOPATH=$HOME/go
export GOBIN=$GOPATH/bin
# Homebrew
export GOROOT="$(brew --prefix golang)/libexec"
# Manual install
# export GOROOT=/usr/local/go
export PATH=$PATH:$GOPATH/bin
export PATH=$PATH:$GOROOT/bin

Hope this helps you to Go :-P

at March 10, 2023 No comments:
Email ThisBlogThis!Share to XShare to FacebookShare to Pinterest
Labels: Go, Homebrew, MAC OSX

Wednesday, March 8, 2023

Nginx to overcome Google WiFi limitations

Just recently I had to replace my old Wifi-Setup with a new system. After some investigation on the topic (and a good offer from amazon warehouse) I decided to give Google Wifi with 3 physical items a try.

I do have a lot of devices in my network that are accessible from the outside, so I set them all to bridged mode, so that they use another DHCP server in the network and use that address pool. Initially it all seemed fine, all my devices where able to keep their IP adresses and worked as before.

However, after some days I got a lot of connection issues, because it is not mesh in that way, so there was no handover between the wifi networks and especially in the areas between two of them I had frequent network switches which was quite annoying.

After a factory reset I set them up as mesh network and forwarded all the necessary traffic from the Internet gateway to the main Google Wifi IP. Devices got new IP addresses from a different pool now, but the network was working fine.

As initially said, I have devices that are visible from the outside (e.g. Home automation, NAS,...) which had set static IP addresses for simplicity. This is a problem currently for the Google Home App, which is used to setup the network, because it does show only devices that have IP addresses assigned by its DHCP. Even if the static IP is in the range of the subnet mask it will not show up.

What next? Most devices, like my Synology NAS is able to obtain an Address from the DHCP, which means that I had to assign a static address inside the Google Home App for that device to be able to access it reliably form outside.

However, some of my devices are not enabled for DHCP and then you're screwed, unless you have another device in the network that can do the job. In my case I use the Synology NAS which already runs a nginx which can be setup to forward traffic to other IPs. Its a bit tricky, but here is how it works:

  1. Install the Web-package on the NAS to have nginx in place
  2. enable (temporarily) SSH to be able to change the configuration files
  3. SSH into your NAS (you need to be. member of the admin group)
  4. cd /usr/syno/share/nginx/ (thanks to John Shine)
  5. create a new file named as you like with .mustache suffix and refer that file from the nginx.mustache file in this folder.
Now, in my case I did need random TCP traffic, so I had to refer my file outside the http block and I decided to add the reference as the very last line in the configuration. My mustache file than contains something like this

stream { upstream mytcpstream { server X.X.X.X:4321; } server { listen 1234; proxy_pass mytcpstream; } }

Now all that's left is to setup the firewall of the NAS accordingly and give it a try.

That's far from ideal I admit, but that said... PLEASE Google, add a possibility to add a random Port forward to your Home App, or show all devices in the network, not just the ones that your DHCP assigned. THANKS

at March 08, 2023 No comments:
Email ThisBlogThis!Share to XShare to FacebookShare to Pinterest
Labels: GoogleWifi, NAS, Nginx, Synology

Monday, July 23, 2018

Mobvoi TicWatch Pro

Even though I'm an iOS developer, in my daily life I'm currently using a Motorola G5+ and not an iPhone. There are several reasons for this choice, but the main one is probably that I'm often dropping my phone and iPhone screen replacements are way to expensive :-)

However I've been using a Motorola 360 2nd gen for about a year. Despite that I liked the look of it and the functions it offers, I've decided to sell it already about a year ago being without smartwatch since then. I my opinion wearOS (or Android Wear as it was called at that time) is still behind watchOS, but I'm a bit old school when it comes to watches so a rectangular watch was never a real option. Beside that the main weakness of all smartwatches is the battery life...

But nowadays there is a smartwatch that faces this problem. I know that the TicWatch Pro is not the first of its kind, but the first that got my attention so I've decided to buy one. The approach that has been taken by the Chinese company is to put an LCD on top of the OLED display which jumps in whenever there is no need for smart features. Basically it puts wearOS on sleep when you just wear it and fires it up when you look at your wrist or when you press a button. In theory that's what you need and when it helps you to charge the watch just once a week then it is a real game changer... if it can hold the promises in real life usage too.


Now I have it since last Friday (about 4 days) and I'm about to charge it the first time. I guess this first week is not representative, as it had to update all its contents, install all the apps and me constantly playing with it, so I'll update this post next week to provide some real numbers.
at July 23, 2018 No comments:
Email ThisBlogThis!Share to XShare to FacebookShare to Pinterest
Labels: Android, Mobvoi, Pro, TicWatch, watchOS, wearOS

Friday, May 27, 2016

Update all Ruby Gems on your Mac

Usually I used the command I found here which is

sudo gem update `gem list | cut -d ' ' -f 1`

However sometimes, if you are on a VM that hasn't set the profile correctly you'll need to specify the right directory. So the effective command working everywhere (so far) is.

sudo gem update -n /usr/local/bin `gem list | cut -d ' ' -f 1`
at May 27, 2016 No comments:
Email ThisBlogThis!Share to XShare to FacebookShare to Pinterest
Labels: gem, MAC OSX, Ruby

Wednesday, March 30, 2016

GIT-LFS on Bitbucket Cloud

There are a lot of posts all over the internet on GIT-LFS and bitbucket. However most of those posts mention a setting that is not available on the Cloud version of Bitbucket.

So, to give a simple answer to the question "Can I still use GIT-LFS?" ... "Yes, but.."

Why but? Well, it does come with a cost. Actually there is no build-in solution to deal with large files if your repository is hosted on the bitbucket cloud, but the GIT-LFS in general is just a concept, that can be put on every GIT service. The problem is where to put that data?

The answer is any kind of web accessible blob- or file storage. Popular answers in this case are AWS S3 and Azure, but every MongoDB or even a file system is enough (This depends a bit on how reliable it needs to be and how much you are willing to spend).

Now I guess its time to look into what GIT-LFS really is. As we said earlier it is a concept, which is not entirely true, as it is also a protocol. Actually it is able to interfere a push command (with a pre-push hook) exchange the actual file that you'd push with a "link" (an OID basically) and push that to the repository. The real file is then sent to the "lfsurl" specified in the ".git/config" file.

Unfortunately storages like the ones mentioned above are not accepting this protocol calls directly, neither git-lfs can deal with their (complex) authentication mechanisms, so you'll need some sort of interface manager, which is likely to be some sort of server.

Lately I was working on an extension to an existing solution written in Node.JS which tries to give a solution to this problem. It has the ability to talk to those storages mentioned above and implements most of the git-lfs protocol in its current version. All you need to do is putting it on a server, configure it to accept your clients and access your storage and it will work.

As it is an open source project you can contribute in any form if you like.
at March 30, 2016 No comments:
Email ThisBlogThis!Share to XShare to FacebookShare to Pinterest
Labels: Bitbucket, GIT, GIT-LFS

Tuesday, November 3, 2015

Setup the new Apple TV

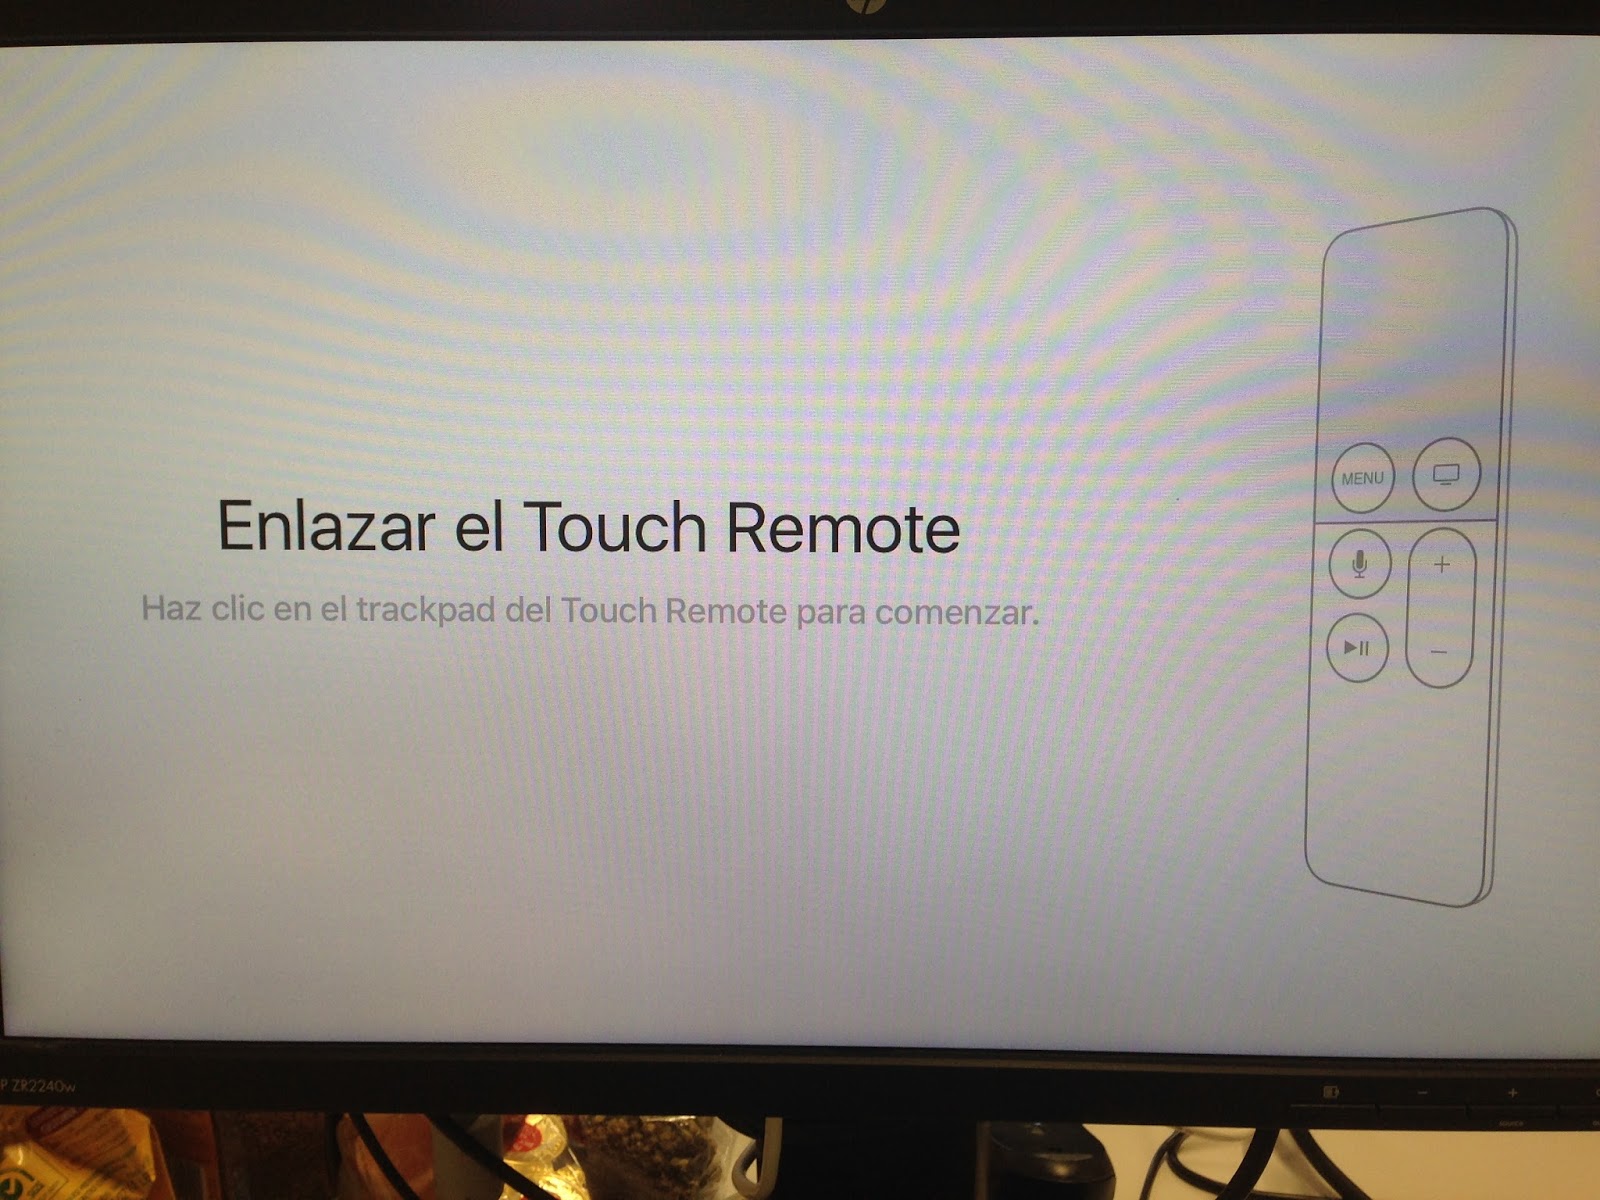
After unpacking and flashing it with the latest Beta I could finally set it up
It is going through all the languages in a row


There is the possibility to take the settings from an iPhone/iPad

Unfortunately none of my devices was already on iOS 9.1


at November 03, 2015 No comments:
Email ThisBlogThis!Share to XShare to FacebookShare to Pinterest
Labels: Apple, AppleTV, DevelopmentKit, Setup

Monday, November 2, 2015

Unpacking the new AppleTV Developer Kit

I guess you're not really interested in what I've to say about the unpacking, so just watch the pictures:


So and there it is :-D
at November 02, 2015 No comments:
Email ThisBlogThis!Share to XShare to FacebookShare to Pinterest
Labels: Apple, AppleTV, DevelopmentKit, Unpacking

Saturday, October 31, 2015

Got selected to have an early look at the new AppleTV

Basically it all started with the following email that I got just a week after participating to the Apple TV lottery.

After accepting the terms, which basically say that I'm not allowed to show pictures or write reviews about it (that's actually why this article is published so late)

I finally got the confirmation that Apple is sending me the AppleTV Developer Kit for 1€


Stay tuned for the unpacking article coming as soon as the AppleTV is publicly released.


at October 31, 2015 No comments:
Email ThisBlogThis!Share to XShare to FacebookShare to Pinterest
Labels: Apple, AppleTV, DevelopmentKit

Tuesday, October 27, 2015

MAC: Keep your gems up to date

If you want to have all your gems updated there is quite a simple command to execute
sudo gem update `gem list | cut -d ' ' -f 1`
This will take the list of all installed gems and update it to the latest available version.
Furthermore you can simply remove now all the unused, old versions by executing
sudo gem cleanup
And you're done
 
at October 27, 2015 No comments:
Email ThisBlogThis!Share to XShare to FacebookShare to Pinterest
Labels: gem, MAC OSX, Ruby

Wednesday, June 17, 2015

Objective-C: Travis-CI and Coveralls.io (2/2)

Until now we've added to our repository just the support for Travis-CI. Now it's time for Coveralls.io which is basically the second part of this Pull Request.

Coveralls is a service that analyses your code and gives a percentage of code that is covered by some tests.

Coveralls.io

If your code is already on Github, you can navigate now to Coveralls.io and activate the support for your repository, otherwise you can do it at the end, but then the next commit will show up on Coveralls.io. As we already had for the Travis-CI;

1) This service will start after Travis-CI so he needed to invoke it when Travis-CI has finished. This can be done by adding it to the .travis.yml
after_success: bundle exec slather
As you may already expect he had to include slather into our Gemfile and execute it
source 'https://rubygems.org'
gem 'cocoapods'
gem 'rake'
gem 'slather'
gem 'xcpretty'
Slather, as Travis-CI needs its own configuration file which is .slather.yml in this case

2) If you'd run now the bundle exec slather command you'll probably end up with an error as Xcode is not generating coverage files if they are not needed. There are basically two flags to set in the xcodeproject file
  • GCC_GENERATE_TEST_COVERAGE_FILES = YES
  • GCC_INSTRUMENT_PROGRAM_FLOW_ARCS = YES
Basically there are the methods to set these flags

  1. Open Xcode, search in Build settings for Instrument Program Flow and Generate Test Coverage Files and set both of them to YES which will generate the needed files on every build
  2. You can do the same executing the command $ slather setup path/to/project.xcodeproj which will automatically set those flags
  3. Add the parameters to the build command in the Rakefile which will generate them only when you execute the rake build.

3) Now as in Travis-CI just add the badge to the readme
[![Coverage Status](https://coveralls.io/repos/hons82/THSegmentedPager/badge.svg)](https://coveralls.io/r/hons82/THSegmentedPager)
at June 17, 2015 No comments:
Email ThisBlogThis!Share to XShare to FacebookShare to Pinterest
Labels: CocoaPods, Coveralls.io, Objective-C, Travis-CI

Objective-C: Travis-CI and Coveralls.io (1/2)

Just recently one of my projects has been chosen to become featured with test during the CocoaPods Test Jam.

Goal of this event was to add tests (XCTest, Specta / Expecta , Kiwi or Cedar) to the projects (THSegmentedPager in my case) to reach a certain coverage and add the project to the Travis-CI Continuous Integration service as well as to the Coveralls test coverage service.

In this article I'll skip the creation of the tests itself (Those can be seen in the repository and watching the Pull Request that he sent when everything was done) and jump directly to the Travis-CI and Coveralls.io integration.

Travis-CI

If your project is already on Github you could navigate to Travis-CI connect it with your Github account and enable it for Travis-CI. If not you'll need to do it at the end of the process and it will run with the next commit.

1) As the project uses CocoaPods he add a Gemfile with it as dependency which you can execute using bundler (sudo gem install bundler)
$ bundle install
Resolving dependencies...
Using i18n 0.7.0
Using json 1.8.3
Using minitest 5.7.0
Using thread_safe 0.3.5
Using tzinfo 1.2.2
Using activesupport 4.2.1
Using claide 0.8.1
Using fuzzy_match 2.0.4
Using nap 0.8.0
Using cocoapods-core 0.37.2
Using cocoapods-downloader 0.9.0
Using cocoapods-plugins 0.4.2
Using netrc 0.7.8
Using cocoapods-trunk 0.6.1
Using cocoapods-try 0.4.5
Using colored 1.2
Using escape 0.0.4
Using molinillo 0.2.3
Using xcodeproj 0.24.2
Using cocoapods 0.37.2
Using bundler 1.10.3
Bundle complete! 1 Gemfile dependency, 21 gems now installed.
Use `bundle show [gemname]` to see where a bundled gem is installed.

2) Now he add the .travis.yml file which will tell to Travis what is exactly to do.
language: objective-c
before_script:
- bundle exec pod install --project-directory=THSegmentedPagerExample
script:
- set -o pipefail && bundle exec rake test | bundle exec xcpretty --test --color
- bundle exec pod lib lint --quick
To make this commands work we'll need to add the missing commands (rake and xcpretty)to the Gemfile and execute it again
source 'https://rubygems.org'
gem 'cocoapods'
gem 'rake'
gem 'xcpretty'
The script in .travis.yml points to a rake target named "test" which he had to define in the Rakefile
desc 'Run tests'
task :test do
  command = "xcodebuild \
    -workspace THSegmentedPagerExample/THSegmentedPagerExample.xcworkspace \
    -scheme THSegmentedPagerExample \
    -sdk iphonesimulator -destination 'platform=iOS Simulator,name=iPhone 6,OS=8.1' \
    test"
  system(command) or exit 1
end
task :default => :test
If you're not sure about how to write the script it is probably the best option to open a console; cd to the project root and run it

3) One more thing which is often forgotten is to share the scheme. This is done in Xcode

4) Now, as you'll probably want to show that you're using a CI service all that is left is to add a badge to the readme
[![Build Status](https://travis-ci.org/hons82/THSegmentedPager.png)](https://travis-ci.org/hons82/THSegmentedPager)
at June 17, 2015 No comments:
Email ThisBlogThis!Share to XShare to FacebookShare to Pinterest
Labels: CocoaPods, Coveralls.io, Objective-C, Travis-CI

Monday, June 15, 2015

OSX 10.11 - El Capitan

I was so curious about El Capitan that I had to download and install it on my old Mac just after it was present in the developer center.

As expected from the presentation and the reviews the main changes are under the hood, so beside the updated notes app, the improved Spotlight and window management you'll not see a lot. However, more interesting for me is to see when it can be used for development.

In previous OSX versions we hat always problems with some tools that were simply not ready for updates. Despite that on El Capitan most things are working one thing that we use quite often was not working.

Cocoapods

The issue here was something like this
ERROR: While executing gem ... (Errno::EPERM) Operation not permitted
The issue behind is the "rootless" feature that comes with 10.11 as I've found here. For now it needs to be disabled.
sudo nvram boot-args="rootless=0"
Now it seems like it would install correctly, however there will come up an error wit a dependency that cocoapods needs "nokogiri".
This seems not to point to the right libraries, so you'll need to install it first using this command
sudo gem install nokogiri -- --with-xml2-include=/Applications/Xcode.app/Contents/Developer/Platforms/MacOSX.platform/Developer/SDKs/MacOSX10.10.sdk/usr/include/libxml2 --use-system-libraries
Now you should be able to use cocoapods again.

To Be Continued ...

at June 15, 2015 No comments:
Email ThisBlogThis!Share to XShare to FacebookShare to Pinterest
Labels: 10.11, CocoaPods, OSX

Monday, May 18, 2015

Setup Continuous Integration for xCode

Just recently we found an old Mac Mini from 2010 in our basement and decided to set it up as a continuous integration server for our iOS APPs (and for Android too, but that's another topic)

The installation is quite simple. Just install Mac OSX, in our case it is an installation of Yosemite, as usual. Then go to the Apple Developer page, download the latest OSX sever dmg and install it on the server. Keep this dmg, because you'll need to install it on every machine that should be able to remotely administer that server (your development mac for instance)

On the server then you just need to enable the "Xcode" service and you're basically done. You could actually use that server as a git repository too, but as it currently has just a single HDD installed we decided to put the git on another server.

The installation process and the creation of a CI-bot is explained quite well by Apple, so I'll not loose a lot of time on that. The reason I write this post is how to cover the special cases that we have in our development procedure.
  • git submodules
  • cocoapods dependencies
  • cocoapods private specs repository
The CI server does just a normal clone of your git repo, compiles it and runs all the test, but it is not aware of the special cases, that are over there.

Fortunately Apple offers the possibility to add pre-compilation scripts where you can handle this. Because I wasn't sure if I did it right I put my script into this discussion to get feedback on it. Finally I came up with a slightly shorter version.

export LC_ALL="en_US.UTF-8"

if [ ! -e "$HOME/.cocoapods/repos/reponame" ]
then
pod repo add reponame https://username:password@path/to/private/Specs.git
fi

cd ${XCS_SOURCE_DIR}/Projectname_without_dot_git

git submodule update --init --recursive

pod update
The command "pod repo add" deals with the private repo spec, then of course the "git submodule update --init --recursive" command which does updates all the submodules and finally the "pod update" which is adding the pods to the project.

However I still get some errors which I can't fix right now. I'll keep you up to date when I'll find a solution to this.
at May 18, 2015 No comments:
Email ThisBlogThis!Share to XShare to FacebookShare to Pinterest
Labels: CI, Continuous Integration, iOS, OSX, Xcode

Tuesday, March 17, 2015

Udemy Courses

Quite recently I found myself with a tiny bit of free time, so I was looking for a course to obtain a new skill.

Luckily I just got a mail from Udemy with this link inside

Link to courses
So lets see how it is to code a game in Unity3D :-D
at March 17, 2015 No comments:
Email ThisBlogThis!Share to XShare to FacebookShare to Pinterest
Labels: Courses, Udemy

The End of Google Code

I recently got this mail from Google


Google Code
Hello,
Earlier today, Google announced we will be turning down Google Code Project Hosting. The service started in 2006 with the goal of providing a scalable and reliable way of hosting open source projects. Since that time, millions of people have contributed to open source projects hosted on the site.
But a lot has changed since 2006. In the past nine years, many other options for hosting open source projects have popped up, along with vibrant communities of developers. It’s time to recognize that Google Code’s mission to provide open source projects a home has been accomplished by others, such as GitHub and Bitbucket.
We will be shutting down Google Code over the coming months. Starting today, the site will no longer accept new projects, but will remain functionally unchanged until August 2015. After that, project data will be read-only. Early next year, the site will shut down, but project data will be available for download in an archive format.
As the owner of the following projects, you have several options for migrating your data.
  • spellchecker
  • izock
  • falconhttp
  • travianix
  • gwtcom
The simplest option would be to use the Google Code Exporter, a new tool that will allow you to export your projects directly to GitHub. Alternatively, we have documentation on how to migrate to other services — GitHub, Bitbucket, and SourceForge — manually.
For more information, please see the Google Open Source blog or contact google-code-shutdown@google.com.
-The Google Code team
Google Inc. 1600 Amphitheatre Parkway, Mountain View, CA 94043
You have received this mandatory email service announcement to update you about important changes to Google Code Project Hosting.

Quite interesting indeed, because it contained some projects that I made during my studies that I completely forgot.

Fortunately Google offers quite a good exporter to GitHub, so I was able to keep at least the intresting projects in my github account.


  • falconHTTP
  • gwtcom

Even though both exports failed twice before appearing in GitHub
at March 17, 2015 No comments:
Email ThisBlogThis!Share to XShare to FacebookShare to Pinterest
Labels: GitHub, GoogleCode

Thursday, October 23, 2014

GitHub: THCalendarDatePicker


Today my project THCalendarDatePicker finally got its 200th star on Github.

Thank you all for supporting, contributing and loving this little Control :-)
at October 23, 2014 2 comments:
Email ThisBlogThis!Share to XShare to FacebookShare to Pinterest
Labels: GitHub, hons82

iOSAPP - ShoppingList - Fast & Simple V:1.1.0

ShoppingList - Fast & Simple


What's New in Version 1.1.0

- Now you can have more than a single shopping list
- Adaption to iOS8
- Bugfixes
at October 23, 2014 No comments:
Email ThisBlogThis!Share to XShare to FacebookShare to Pinterest
Labels: iOS, iOS8, iPad, iPhone, ShoppingList

Thursday, August 28, 2014

iOSAPP - BLETimeTracker V:1.0.0

BLETimeTracker


Are you surrounded of iBeacon™ senders when you go to work? Well I am!

Furthermore I've to track the time I'm sitting in front of my computer, so I developed this APP that automatically tracks this time by running a timer when I'm in place and stop it when I leave.

If you want to use it and there is no iBeacon™ sender yet available check if your computer supports the BLE standard and turn it into an iBeacon™ sender.


at August 28, 2014 No comments:
Email ThisBlogThis!Share to XShare to FacebookShare to Pinterest
Labels: iOS, iOS7, TimeTracker

Wednesday, July 23, 2014

iOSAPP - MoneyBunny V:1.2.0


MoneyBunny


This morning Apple released version MoneyBunny 1.2.0. With this there is finally a dedicated version for the iPad together with a lot of smaller bugfixes.

Enjoy
at July 23, 2014 No comments:
Email ThisBlogThis!Share to XShare to FacebookShare to Pinterest
Labels: iOS, iOS7, iPhone, MoneyBunny

Friday, May 30, 2014

UITableViewHeader done right

There are basically three possibilities to create headers in UITableViews
  1. Create them in the Code
  2. Prepare them as UITableViewCell in your storyboard and use them in the code
  3. Put them in separate .xib files and register these files as prototypes for headers or footers
(More details can be found here)

1) Create them in Code means that you'll need to define a UIView class and add subviews to that until you'll have the header you wanna see. If you don't use storyboard and don't want to use any additional .xib files this might be the solution. However this means that you'll need to define manually all constraints which might be quite painful if your header is complex in structure

2) The second method looks quite simple and straight forward (Described here more in detail), however it has some drawbacks. Actually in this case you're returning a Cell that you dequeued from the pool of cells the table holds internally. From iOS 7.1 on you'll get a warning in the log that you're accessing a cell without index path. Furthermore there is another issue causing this cells to disappear on partial reload of sections.
Obviously that's not acceptable in productive code, so the solution can be to return the "cell.contentView" instead of the cell itself. This is working and the results where really promising until I did a "longpress" on such a header. This action will cause the header to send a message to its cell saying that the gesture recognizer should begin to work. As the cell is not there anymore this will lead to a crash of the whole APP (BAD_ACCESS_ERR)
To fix this you'll need to remove all gesture recognizers from the contentView before returning it as header view as this stackoverflow answer points out.

3) This is actually the solution if you want to use xcodes graphical interface builder tools and the process is actually quite simple.
First create a class that inherits from UITableViewHeaderFooterView, then create a .xib file containing this view (I usually put the TableViewController as file owner ) as class with the complex header fields you need.
Next open your TableViewController and register this .xib as prototype for the header.
- (void)viewDidLoad {
[super viewDidLoad];
UINib *sectionHeaderNib = [UINib nibWithNibName:@"SectionHeaderView" bundle:nil];
[self.tableView registerNib:sectionHeaderNib forHeaderFooterViewReuseIdentifier:SectionHeaderViewIdentifier];
}
In the viewForHeaderInSection method you can now dequeue it and use it
- (UIView *)tableView:(UITableView *)tableView viewForHeaderInSection:(NSInteger)section {

SectionHeaderView *sectionHeaderView = [self.tableView dequeueReusableHeaderFooterViewWithIdentifier:SectionHeaderViewIdentifier];
[..Fill the view with real values..]
return sectionHeaderView;
}
For more details to this last method watch the complete sample program
at May 30, 2014 No comments:
Email ThisBlogThis!Share to XShare to FacebookShare to Pinterest
Labels: iOS, UITableViewController, UITableViewHeaderFooterView, viewForHeaderInSection
Newer Posts Older Posts Home
Subscribe to: Posts (Atom)

Golang setup PATH

Quite recently we startet in the company to use and write some Go programs. I love Go. It's easy to learn, read and modify. One of the m...

  • Nginx to overcome Google WiFi limitations
    Just recently I had to replace my old Wifi-Setup with a new system. After some investigation on the topic (and a good offer from amazon ware...
  • Golang setup PATH
    Quite recently we startet in the company to use and write some Go programs. I love Go. It's easy to learn, read and modify. One of the m...
  • Change the SSID on your Telecom Italia WiFi modem/router
    If you live in Italy (like me) and your ADSL is provided by Telecom Italia, then you probably got this wireless router as a welcome gift.  I...

Search This Blog

  • Home

About Me

My photo
Hannes
View my complete profile

Blog Archive

  • March 2023 (2)
  • July 2018 (1)
  • May 2016 (1)
  • March 2016 (1)
  • November 2015 (2)
  • October 2015 (2)
  • June 2015 (3)
  • May 2015 (1)
  • March 2015 (2)
  • October 2014 (2)
  • August 2014 (1)
  • July 2014 (1)
  • May 2014 (1)
  • March 2014 (2)
  • February 2014 (2)
  • September 2013 (2)
  • July 2013 (1)
  • June 2013 (3)
  • April 2013 (1)
  • February 2013 (1)
  • January 2013 (2)
  • December 2012 (2)
  • September 2012 (2)
  • August 2012 (1)
  • July 2012 (1)
  • May 2012 (1)
  • March 2012 (1)
  • February 2012 (2)
  • January 2012 (4)
  • December 2011 (2)
  • November 2011 (3)
  • October 2011 (1)
  • September 2011 (1)
  • December 2010 (2)
  • April 2010 (2)
  • March 2010 (3)

Report Abuse

Labels

  • 10.11
  • Android
  • AOP
  • Apple
  • AppleTV
  • aspect
  • Asynchronous
  • ATV
  • ATV2
  • Beta
  • BibTex
  • Bitbucket
  • Caching
  • CAS
  • CentOS
  • CI
  • Cite
  • Client
  • CocoaPods
  • Continuous Integration
  • Courses
  • Coveralls.io
  • Criteria
  • Custom Tabs
  • dd-wrt
  • DevelopmentKit
  • Facebook
  • Filterchain
  • firecore
  • gem
  • Genuine
  • Gesture
  • GIT
  • GIT-LFS
  • GitHub
  • Go
  • GoogleCode
  • GoogleWifi
  • Grub
  • hash
  • Hibernate
  • hibernate-search
  • Hibernate4
  • Homebrew
  • hons82
  • IE
  • iOS
  • iOS7
  • iOS8
  • IP
  • iPad
  • iPhone
  • jailbreak
  • Java
  • Javascript
  • KB949810
  • Kernel
  • LaTeX
  • LazyInitializationException
  • ldap
  • Linux
  • load-time-weaver
  • Login
  • MAC OSX
  • Mavericks
  • migration
  • Mobvoi
  • MoneyBunny
  • multiple IP-Addresses
  • NAS
  • Nginx
  • NIC
  • Objective-C
  • Office
  • OSX
  • Pro
  • PSTCollectionView
  • Push Notification
  • recursive
  • reflection
  • Remote Lazy Loading
  • remove
  • REST
  • router
  • Ruby
  • Safari
  • ScriptEngineManager
  • SDWebImage
  • seas0npass
  • sessionFactory
  • Setup
  • ShoppingList
  • Spring
  • Spring Security
  • Spring3.1
  • SSID
  • SSO
  • StatisticsService
  • SVN
  • Symbols
  • Synology
  • Telecom Italia
  • Testflight
  • TicWatch
  • TimeTracker
  • TL-841N
  • TP-Link
  • Travis-CI
  • TV
  • Udemy
  • UICollectionView
  • UILabel
  • UIScrollView
  • UITableView
  • UITableViewController
  • UITableViewHeaderFooterView
  • UIWebView
  • Unpacking
  • viewForHeaderInSection
  • watchOS
  • wearOS
  • wireless bridge
  • Xcode
Simple theme. Powered by Blogger.